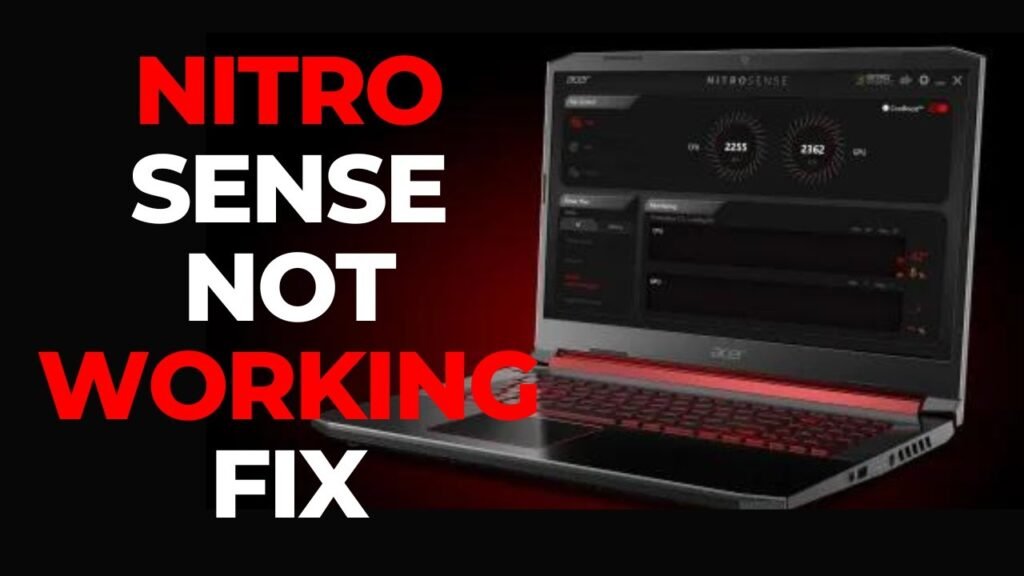
Nitrosense not opening or working? Here’s how to fix it quickly and easily.
Nitrosense is a system monitoring and performance optimization tool for Acer laptops. If you’re experiencing difficulty launching or using Nitrosense, there are a few troubleshooting steps you can take to get it up and running smoothly again.
We will guide you through the process of resolving Nitrosense issues so you can get back to using this useful software without any hassle.
Whether you’re encountering error messages, startup problems, or other glitches, we have the solutions you need to troubleshoot Nitrosense effectively.
Compatibility Issues With Operating System
If you are facing issues with Nitrosense not opening or working properly, it could be due to compatibility issues with your operating system (OS).
Compatibility problems can occur when Nitrosense is not supported by your OS version or if your operating system is outdated.
In this article, we will explore two common compatibility issues with operating systems that can affect the functionality of Nitrosense.
Outdated Operating System
An outdated operating system can prevent Nitrosense from running smoothly on your device.
When using an outdated OS version, you may encounter errors or crashes when trying to open or use Nitrosense.
It is recommended to regularly update your operating system to ensure compatibility with the latest software releases, including Nitrosense.
To check if your OS is outdated and update it:
- Windows: Go to the “Settings” menu, then click on “Update & Security.” Choose “Windows Update” and click on the “Check for updates” button. If updates are available, follow the instructions to install them.
- Mac: Click on the “Apple” menu, then select “System Preferences.” Choose “Software Update” and click on the “Update Now” button. If updates are available, follow the instructions to install them.
- Linux: Depending on your Linux distribution, the steps to update your OS may vary. Generally, you can update your system using the package manager or software update utility provided by your distribution.
Incompatible OS Versions
Another compatibility issue that can cause Nitrosense not to open or work properly is using an incompatible OS version.
Nitrosense may require specific minimum operating system requirements, such as a certain version of Windows or macOS.
To check the compatibility of your operating system with Nitrosense:
- Visit the official Nitrosense website or consult the software documentation for the minimum operating system requirements.
- Compare the recommended OS version with the one installed on your device.
- If your OS version is not supported, you may need to upgrade your operating system to a compatible version or consider using an alternative software that is compatible with your current OS. However, upgrading your operating system is usually the best option to ensure compatibility and access the full functionality of Nitrosense.
By keeping your operating system up to date and ensuring it meets the minimum requirements for Nitrosense, you can resolve compatibility issues and enjoy the enhanced performance and features provided by this powerful software.
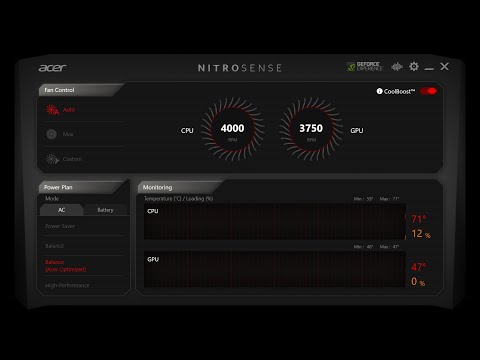
Credit: community.acer.com
Software Glitches And Bugs
Software glitches and bugs can be frustrating, causing unnecessary delays and even hindering the functionality of your devices.
Nitrosense, a software program designed to optimize performance and monitor various components of your NitroSense-enabled Acer laptop, is not immune to such issues.
If you’re encountering problems like Nitrosense not opening or working, you’re not alone. Luckily, these issues can often be resolved with some simple troubleshooting steps.
In this article, we’ll explore a couple of common reasons behind Nitrosense malfunctions: corrupted Nitrosense files and conflicting software installations.
Corrupted Nitrosense Files
One of the primary culprits behind Nitrosense not opening or working properly is corrupted files. These errors can happen due to various reasons such as sudden power outages, improper shutdowns, or malware infections.
Step one in resolving this issue is to check for corrupt files and make sure they’re dealt with appropriately.
Here are a few troubleshooting steps you can take to fix corrupted Nitrosense files:
1. Restart your computer: Sometimes, a simple restart can clear temporary glitches and fix corrupted files. It’s a good idea to start with this step to see if it resolves the issue.
2. Reinstall Nitrosense: Uninstalling and reinstalling Nitrosense can often fix corrupted files. To do this, follow these steps:
– Press the Windows key + R to open the Run dialog box.
– Type “appwiz. cpl” and press Enter to open the Programs and Features window.
– Locate Nitrosense in the list of installed programs, right-click on it, and select Uninstall.
– After the uninstallation is complete, download the latest version of Nitrosense from the official Acer website.
– Double-click on the downloaded file and follow the on-screen instructions to reinstall Nitrosense.
3. Run a system file check: Windows has a built-in tool that can scan for and repair corrupted system files. Here’s how you can use it:
– Press the Windows key + X and select Command Prompt (Admin) or Windows PowerShell (Admin) from the menu.
– In the command prompt window, type “sfc /scannow” and press Enter.
– Wait for the scan to complete, and if any corrupted files are found, the tool will attempt to repair them automatically.
Conflicting Software Installed
Another common reason for Nitrosense glitches is conflicting software installations. Sometimes, certain programs on your computer can conflict with Nitrosense, preventing it from functioning properly.
Identifying and removing these conflicting software installations can help resolve the issue.
Here’s how you can troubleshoot and fix Nitrosense issues caused by conflicting software:
1. Check for conflicting software: Make a list of the programs that are installed on your computer and might potentially interact with Nitrosense. These can include anti-virus programs, system monitoring tools, or other performance optimization software.
2. Temporarily disable or uninstall conflicting software: To determine if any of the listed programs are causing the conflict:
– Open the list of installed programs by pressing the Windows key + R, typing “appwiz. cpl”, and pressing Enter.
– Locate the potentially conflicting software, right-click on it, and select Uninstall or Disable.
– Restart your computer and check if Nitrosense is now working properly.
– If the issue is resolved, you can consider reinstalling the conflicting software or seeking alternative programs that are compatible with Nitrosense.
By following these troubleshooting steps, you should be able to fix common Nitrosense issues caused by corrupted files or conflicting software installations.
Remember to always keep your Nitrosense software updated and regularly check for any available patches or updates from Acer to ensure smooth performance and optimal functionality.
Hardware Malfunction
If you are experiencing issues with Nitrosense not opening or working properly, it could be due to a hardware malfunction. Understanding the specific nature of the malfunction can help you troubleshoot and resolve the problem more effectively.
Overheating Issues
One common cause of Nitrosense not opening or working is overheating issues.
When your laptop’s hardware components get too hot, it can lead to system instability and may cause Nitrosense to malfunction. Overheating can occur due to several reasons, such as:
- Clogged cooling fans or vents obstructing proper airflow.
- Inadequate cooling system.
To fix overheating issues and ensure Nitrosense works properly, consider the following steps:
- Ensure proper ventilation by keeping the laptop on a flat, hard surface that allows air to circulate freely.
- Clean the cooling fans and vents regularly to remove dust and debris that can block airflow.
- Consider using a laptop cooling pad to provide additional cooling support.
Faulty Sensors
Another potential hardware malfunction that can affect the performance of Nitrosense is faulty sensors.
Sensors are responsible for monitoring temperature and other parameters critical for the functioning of the software. If these sensors are not working correctly, Nitrosense may not be able to accurately gather and display system temperature data.
To address this issue:
- Check if there are any loose connections or damaged wires leading to the sensors.
- Consider contacting the laptop manufacturer for further assistance or to request a sensor replacement if necessary.
By addressing overheating issues and faulty sensors, you can increase the chances of Nitrosense opening and working properly.
These troubleshooting steps should help you resolve any hardware-related problems that might be interfering with the software’s functionality.
Update Operating System And Drivers
If you are experiencing issues with Nitrosense not opening or working properly, one of the possible causes could be outdated operating systems or drivers.
It is essential to keep your operating system and drivers up-to-date to ensure smooth performance and compatibility with your programs.
Install Latest Windows Updates
To begin, make sure you have the latest updates for your Windows operating system. Windows frequently releases updates to fix bugs, improve security, and enhance overall system performance. Follow these steps to install the latest updates:
- Click on the Start menu and open the Settings app.
- In the Settings app, click on “Update & Security”.
- Within the Update & Security settings, click on “Windows Update”.
- Click on the “Check for updates” button to see if any updates are available.
- If updates are found, click on “Download” and allow the updates to install.
- Once the updates are installed, restart your computer to apply the changes.
Update Graphics and Chipset Drivers
In addition to updating your operating system, it is crucial to ensure your graphics and chipset drivers are up-to-date.
Outdated drivers can cause compatibility issues and prevent certain applications, like Nitrosense, from working correctly. Here’s how you can update these drivers:
- Visit the official website of your computer manufacturer or the manufacturer of your graphics and chipset drivers.
- Locate the support or downloads section of the website.
- Look for the latest drivers available for your specific model and operating system.
- Download the drivers and follow the provided instructions for installation.
By keeping your operating system and drivers up-to-date, you can alleviate many common issues encountered with Nitrosense.
Following these steps should improve the performance and functionality of Nitrosense, allowing you to fully utilize its features.
Reinstall Or Repair Nitrosense Software
When faced with issues such as Nitrosense not opening or working properly, one effective solution is to reinstall or repair the Nitrosense software.
This method can help in resolving any potential software conflicts or corrupted files that may be causing the problem.
In this section, we will explore three steps to achieve this: uninstalling Nitrosense, downloading and reinstalling Nitrosense, and utilizing the built-in repair functionality.
Uninstall Nitrosense
The first step towards reinstalling or repairing Nitrosense is to uninstall the current software from your device. Follow the steps below:
- Go to the Start menu and open the Control Panel.
- Click on the “Programs” or “Programs and Features” option.
- Locate Nitrosense in the list of installed programs.
- Right-click on Nitrosense and choose “Uninstall”.
- Follow the on-screen instructions to complete the uninstallation process.
Download and Reinstall Nitrosense
After successfully uninstalling Nitrosense, you can proceed to download and reinstall the software by following these steps:
- Visit the official Nitrosense website or a trusted software download repository.
- Search for the latest version of Nitrosense compatible with your operating system.
- Click on the download link and save the installation file to your computer.
- Once the download is complete, locate the installation file and double-click on it to start the installation process.
- Follow the on-screen instructions to complete the installation of Nitrosense.
Use Built-in Repair Functionality
If installing a fresh copy of Nitrosense does not resolve the issue, you can try utilizing the built-in repair functionality to fix any potential errors in the software. Here’s how:
- Open the Control Panel from the Start menu.
- Click on “Programs” or “Programs and Features”.
- Locate Nitrosense in the list of installed programs.
- Right-click on Nitrosense and select “Change” or “Repair”.
- Follow the on-screen instructions to initiate the repair process.
By following these steps, you can effectively reinstall or repair Nitrosense, helping to resolve any issues you might be experiencing with the software.
Remember to restart your device after completing the reinstallation or repair process to ensure the changes take effect.
If the problem persists, you may want to consider reaching out to the Nitro support team for further assistance.
Check For Conflicting Software And Disable
If Nitrosense is not opening or not working properly, it could be due to conflicting software on your computer. Certain programs or applications may interfere with Nitrosense’s functionality, causing it to malfunction or not respond at all.
To resolve this issue, you need to identify and disable any problematic software that might be causing the conflict.
Identify and Disable Problematic Software
To identify and disable any conflicting software, follow these steps:
- Open the Task Manager by pressing Ctrl+Shift+Esc simultaneously.
- Click on the “Processes” or “Details” tab to view the running processes on your computer.
- Look for any programs or processes that might be related to software that could conflict with Nitrosense. These could include overclocking utilities, system optimization tools, or other programs that have a similar function to Nitrosense.
- If you find any such software, right-click on the process and select “End Task” or “End Process” to stop its execution.
Once you have disabled the problematic software, try opening Nitrosense again to see if the issue has been resolved.
Test Nitrosense Functionality
After disabling any conflicting software, it is important to test Nitrosense’s functionality to ensure that it is now working properly. Follow these steps to test Nitrosense:
- Open Nitrosense from your computer’s Start menu or desktop shortcut.
- Check if the application opens without any errors or issues.
- Verify if all the features and functions of Nitrosense are working as intended.
If you find that Nitrosense is still not opening or not functioning correctly, you may need to try other troubleshooting methods or seek further assistance.
By checking for conflicting software and disabling it, you can resolve the issue of Nitrosense not opening or not working properly.
Ensure that you have identified and disabled any problematic software, and then test Nitrosense’s functionality to ensure a smooth user experience.
Diagnose And Fix Hardware Issues
When it comes to troubleshooting Nitrosense not opening or working, it’s important to consider potential hardware issues that may be causing the problem.
By diagnosing and addressing these underlying problems, you can get your Nitrosense up and running smoothly again.
Let’s explore some common hardware issues and their possible solutions.
Check for Overheating
Overheating is a common issue that can prevent Nitrosense from functioning properly. Excessive heat can lead to system instability, causing software malfunctions. To check for overheating, you can:
- Feel the base of your laptop or the back of your desktop for heat. If it feels abnormally hot, overheating may be the culprit.
- Access your BIOS or UEFI settings by restarting your computer and pressing the corresponding key (e.g., F2 or Del) during startup.
- Look for temperature readings within the BIOS/UEFI settings, typically located under “System Information” or a similar section.
- If the temperature exceeds the recommended range (varies depending on the model), proceed to clean the air vents and fans.
Clean Air Vents and Fans
Dust and debris can accumulate on your laptop’s air vents and fans over time, obstructing proper airflow and resulting in overheating. Here’s how you can clean them:
- Gather a can of compressed air, a clean cloth, and a small brush.
- Power off your laptop and unplug it from any power source.
- Locate the air vents and fans on your laptop. These are usually found on the sides, back, or bottom.
- Use the small brush to gently remove any loose dust or debris from the vents and fans.
- Use the compressed air to blow away any remaining dust or debris, ensuring you hold the can in an upright position to prevent liquid from escaping.
- Wipe the outer surface of the laptop with a clean cloth.
- Once the cleaning process is complete, restart your laptop and check if Nitrosense is working properly.
Replace Faulty Sensors
If your Nitrosense is still not opening or working after checking for overheating and cleaning the air vents, it’s possible that faulty sensors are to blame. Sensors play a crucial role in monitoring system temperature and maintaining optimal performance.
To replace faulty sensors, you may need to:
- Identify the specific sensor that might be causing the issue. This may require consulting the manufacturer’s documentation or seeking professional assistance.
- Order a replacement sensor from a reputable vendor that matches the make and model of your computer.
- Follow manufacturer guidelines, which typically involve opening up your computer and carefully disconnecting and reconnecting the faulty sensor.
- Once the replacement has been made, reassemble your computer and test if Nitrosense is now functioning correctly.
By identifying and rectifying hardware issues related to Nitrosense, you can ensure your software functions smoothly, allowing you to make the most of its features.
Don’t let hardware issues hinder your Nitrosense experience – diagnose, troubleshoot, and enjoy seamless performance.
Edit Windows Registry Entries
One common issue that users encounter when using Nitrosense is the inability to open or run the program. This can be frustrating, especially if you rely on Nitrosense to monitor and optimize your computer’s performance.
However, there is a solution that can help you get Nitrosense up and running again. By editing the Windows registry entries related to Nitrosense, you can easily fix this problem.
Here’s how:
Backup Registry
Before you start editing the Windows registry entries, it’s important to create a backup of your registry. This will serve as a safeguard in case anything goes wrong during the editing process. Here’s how you can backup your registry:
- Press
Windows Key + Rto open the Run dialog box. - Type
regeditand pressEnterto open the Registry Editor. - In the Registry Editor, click on File in the top-left corner.
- Select Export.
- Choose a location on your computer where you want to save the backup.
- Enter a name for the backup file.
- Make sure that the Selected branch option is selected, and then click Save to create the backup.
Locate Nitrosense Entries
Now that you have created a backup of your registry, it’s time to locate the Nitrosense entries that you need to modify or delete. Follow these steps:
- Open the Registry Editor by pressing
Windows Key + Rto open the Run dialog box, typeregedit, and then pressEnter. - In the Registry Editor, navigate to the following path:
HKEY_CURRENT_USER\Software\Nitrosense. - Here, you will find the entries related to Nitrosense.
Modify or Delete Entries
Once you have located the Nitrosense entries, you can now modify or delete them to fix the issue. Follow these steps:
- Right-click on the entry that you want to modify or delete.
- Select Modify to edit the entry’s value, or select Delete to remove the entry completely.
- Make the necessary changes or confirm the deletion.
- Repeat the above steps for any other Nitrosense entries that you need to modify or delete.
After modifying or deleting the Nitrosense entries, close the Registry Editor and restart your computer. Once your computer has rebooted, try opening Nitrosense again. You should now be able to use the program without any issues.
Perform System Restore
If you are experiencing issues with Nitrosense not opening or working properly, one effective solution is to perform a system restore.
This can help return your computer to a previous stable state, allowing you to resolve any conflicts or errors that may be preventing Nitrosense from functioning optimally.
In this section, we will guide you through the steps to perform a system restore and get Nitrosense up and running again.
Create Restore Point
Before proceeding with the system restore process, it is important to create a restore point. This will serve as a backup of your current system settings and files, allowing you to revert back to this state if needed. To create a restore point:
- Click on the Start button and type in “Create a restore point” in the search bar.
- Select the Create a restore point option from the search results.
- In the System Properties window, click on the Create… button.
- Give your restore point a descriptive name, such as “Pre-Nitrosense Issue”.
- Click Create to create the restore point.
- Once the process is complete, click Close to exit the System Properties window.
Access System Restore
Now that you have created a restore point, you can proceed to access the system restore feature to fix the Nitrosense issue. Here’s how:
- Click on the Start button and type in “System Restore” in the search bar.
- Select the Create a restore point option from the search results.
- In the System Properties window, click on the System Restore… button.
Choose the Previous Stable State
Once you have accessed the System Restore feature, you need to choose a previous stable state to restore your computer to. Follow these steps:
- In the System Restore window, you will see a list of available restore points.
- Select a restore point that predates the Nitrosense issue.
- Click on Next to continue.
- Review the details of the restore point and ensure it corresponds to a stable state.
- Click on Finish to initiate the system restore process.
- Wait for the restoration process to complete. Your computer will restart during this process.
Once the system restore is finished, your computer should be reverted back to the selected stable state. This should resolve any issues with Nitrosense not opening or working correctly. You can now launch Nitrosense and enjoy its features without any interruptions.
Seek Professional Assistance
If you have tried all the troubleshooting steps mentioned above and Nitrosense still refuses to open or work properly, it might be time to seek professional assistance. Here are two options you can consider:
Contact Nitrosense Support
Your first option is to reach out to the Nitrosense support team directly. They have a dedicated support team that can help you troubleshoot the issue and provide you with specific instructions or solutions. Here’s how you can get in touch with them:
- Visit the Nitrosense website and navigate to the support or contact us page.
- Look for their customer support email or phone number.
- Write a detailed email explaining the issue you are facing with Nitrosense not opening or working.
- Include any error messages or codes that you have encountered.
- Wait for their response and follow their instructions carefully.
Consult a Computer Technician
If you prefer a hands-on approach or feel that the issue might be more complex, consulting a computer technician is a good option.
These are trained professionals who specialize in diagnosing and fixing computer-related issues. Here’s what you can do:
- Search for local computer repair shops or technicians in your area.
- Read reviews and ask for recommendations from friends or family.
- Contact the selected technician and explain the issue you are facing with Nitrosense.
- Schedule an appointment and bring your computer to their service center.
- Make sure to provide all the necessary details and be ready to answer any questions they might have.
- Allow the technician to thoroughly diagnose the problem and follow their advice for repairs or troubleshooting steps.
Remember, seeking professional assistance is sometimes the best solution when you have exhausted all other options.
Whether it’s contacting Nitrosense support or consulting a computer technician, they have the expertise to resolve more complex issues and get Nitrosense up and running again.
FAQs Of Nitrosense Not Opening Or Working
Why I Can’t Open My Nitrosense?
Unable to open NitroSense? Ensure compatibility, update drivers, reinstall software, or check for conflicting programs.
Why Is My Acer Nitro 5 Not Starting?
Possible Answer: The Acer Nitro 5 may not start due to power issues, faulty hardware, or software glitches.
How Do I Reinstall Acer Nitrosense?
To reinstall Acer NitroSense, follow these steps:
1. Go to the Acer website and search for the NitroSense software.
2. Download the latest version of NitroSense from the official Acer website.
3. Open the downloaded file and follow the on-screen instructions to install NitroSense again.
4. After installation, restart your Acer laptop to complete the reinstallation process.
How Do I Force My Acer Nitro 5 To Turn On?
To force your Acer Nitro 5 to turn on, try these steps:
1. Ensure the power adapter is connected properly.
2. Hold down the power button for 10 seconds and then release it.
3. Check if the battery is charged and try plugging in the laptop.
4. If nothing works, seek technical support or contact Acer customer service.
Conclusion
To summarize, if you’re experiencing difficulties with Nitrosense not opening or working, you’re not alone. However, by following the troubleshooting steps mentioned in this blog post, you can easily fix this issue.
Remember to start by checking the compatibility of your device, updating your software, and ensuring that Nitrosense is enabled in your BIOS settings.
If these basic steps don’t resolve the problem, you can try reinstalling Nitrosense or contacting your computer manufacturer’s support team for further assistance.
It’s important to remain patient and persistent while troubleshooting, as technical issues can often be resolved with the right approach.
By addressing the problem promptly, you’ll be able to enjoy the full functionality of Nitrosense and optimize your computer’s performance.
Don’t let this inconvenience hinder your productivity – take action and get your Nitrosense up and running smoothly again.